
How I Prepare for Wall Tiling and Why Proper Preparation Is Essential
When it comes to wall tiling, preparation is just as important as the tiling itself. A well-prepared surface ensures that the tiles adhere properly and look aesthetically pleasing. Let me share how I prepare for a tiling project and what factors influence the time it takes to complete the job.
1. Preparing and Protecting the Workspace
The first step is always to prepare the workspace to ensure everything stays clean and organized during the tiling process:
- Removing or protecting furniture: I try to empty the room completely. If that’s not possible, I cover the furniture with protective sheets to avoid damage or dirt.
- Protecting the floor: To prevent adhesive or grout spills from damaging the floor, I use heavy-duty plastic sheets or protective boards.
This step ensures a clean working environment and reduces the time needed for cleanup afterward.
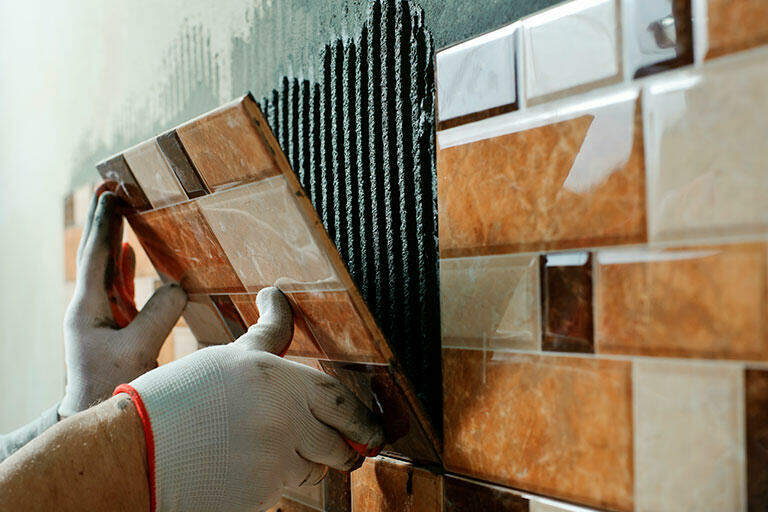
2. Cleaning and Preparing the Walls
Tiles adhere best to clean and properly prepared walls:
- Dust removal: I thoroughly clean the surface to remove dust, grease, or any other residue.
- Smoothing the surface: If the wall is uneven, I use filler or plaster to even it out. This is especially important for decorative tiles to ensure a perfect finish.
- Priming: I apply a special bonding primer to improve the adhesive’s grip on the surface.
3. Selecting and Preparing the Tiles
Choosing the right tiles and materials also impacts the project’s duration:
- Pre-cutting tiles: I cut tiles to size and organize them in advance to streamline the installation process.
- Preparing the adhesive: I always use the appropriate adhesive for the surface type to ensure durability.
4. What Affects the Duration of Tiling?
Several factors determine how long a tiling project will take:
- The condition of the surface: Uneven walls or surfaces requiring significant repairs can extend the preparation time.
- Type and pattern of tiles: Decorative patterns or intricate details take more time to complete.
- Size of the area: Larger surfaces naturally require more time, especially if there are many corners, protrusions, or hard-to-reach spots.
On average, tiling a standard-sized room – including preparation – takes 2-4 days, but this varies depending on the project’s complexity.
Why Is Proper Preparation Worth the Time?
Skipping preparation can lead to future problems, such as tiles detaching or cracking prematurely. A well-prepared wall ensures that the tiles are both durable and visually flawless. I always focus on the small details in every project to ensure my clients are fully satisfied.
Conclusion
Preparing for wall tiling not only makes the job faster but also guarantees a durable and impeccable result. By carefully completing each step, the tiling won’t just look great but will also be highly functional.