Which Season is Best for Painting?

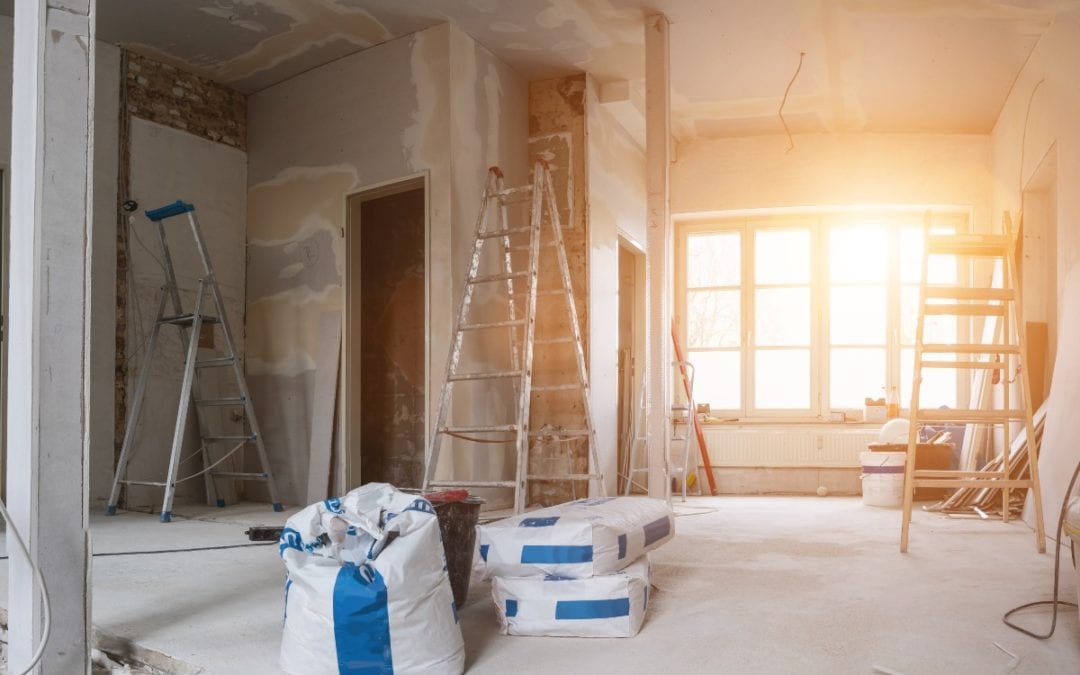
Painting walls or furniture is not only a creative task but also a job that should be done during the right season to ensure a durable and beautiful result. Weather conditions, humidity, and temperature all significantly affect the drying and adhesion of paint. Let’s explore which season is ideal for painting and the weather conditions to keep in mind!


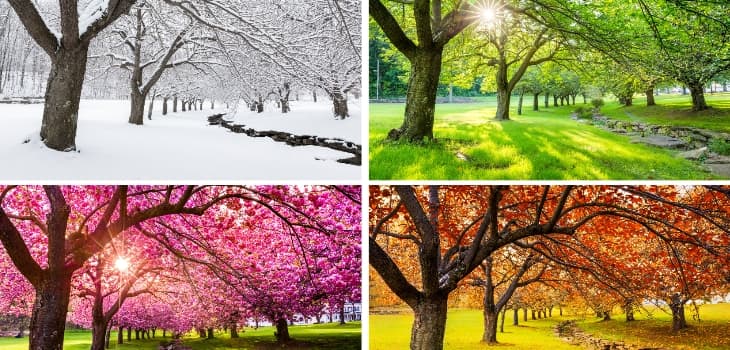
Spring – The Season of Fresh Beginnings

Spring is often an ideal season for painting, as the weather is generally more stable, with temperatures neither too cold nor too hot.

  • Advantages:
    • Daytime temperatures range between 10–25°C, which is perfect for paint drying.
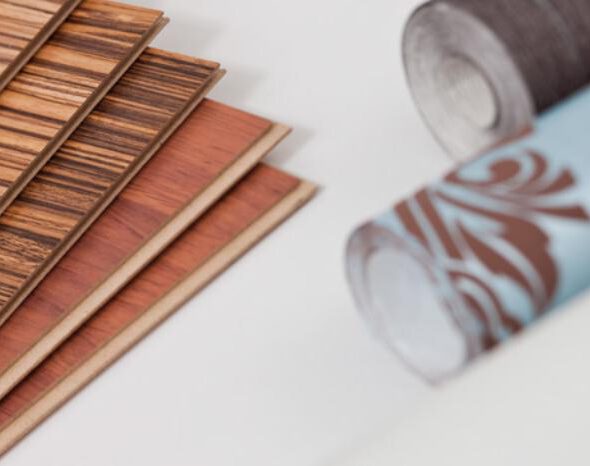
    • The abundance of natural light makes painting easier and helps judge color tones more accurately.
  • Caution: Early spring can still have high humidity levels, which may slow down drying, so ensure proper ventilation in your space.

Summer – The Season of Quick Drying

Summer is the most popular season for painting projects, especially outdoors. Warm weather ensures faster drying, but extreme heat should be avoided.

  • Advantages:
    • Warm temperatures speed up the drying process, allowing you to complete the job faster.
    • Longer daylight hours provide more time to work.
  • Caution:
    • Excessive heat (above 30°C) can cause paint to dry too quickly, leading to patchiness and cracking.
    • Avoid direct sunlight, as it can prevent proper paint adhesion.

Autumn – A Calm Alternative

Autumn, especially the early months, is as favorable as spring for painting. The temperatures are comfortable, and humidity levels are generally lower.

  • Advantages:
    • Ideal temperatures (10–20°C) ensure even paint drying.
    • Pleasant lighting conditions help with precision work.
  • Caution: As autumn progresses, cooler nights and rising humidity can slow the drying process.

Winter – Suitable Only in Certain Conditions

Winter is the least ideal season for painting, particularly outdoors. Cold temperatures and high humidity make it difficult for paint to dry and adhere properly.

  • Advantages:
    • For indoor painting in heated spaces with good ventilation, winter can still work.
    • The off-season allows for more time to focus on projects without seasonal rush.
  • Caution:
    • Cold weather (below 10°C) significantly slows drying and affects paint adhesion.
    • Poor ventilation can lead to lingering paint fumes and odors indoors.

Weather Conditions That Affect Painting

  1. Temperature: Paint dries best between 10–25°C. In cold weather, drying is slower, while in extreme heat, paint may dry too quickly, causing imperfections.
  2. Humidity: High humidity (above 70%) can delay paint drying and affect adhesion. Proper ventilation indoors is essential.
  3. Wind: Strong winds outdoors can cause uneven drying and dust settling on fresh paint.
  4. Lighting: Natural light helps to better see color accuracy and surface imperfections.

Conclusion

The best seasons for painting are spring and autumn when temperature and humidity are optimal. Summer is also a good choice, but care must be taken to avoid extreme heat. Winter is suitable only when indoor conditions are controlled. By choosing the right season and ensuring proper weather conditions, you can achieve a long-lasting and beautiful result.

The 10 Most Common Indoor Renovation Mistakes and How I Avoid Them

Indoor renovation can be a complex task, and small mistakes can lead to unsatisfactory results, added costs, and wasted time. Over the years, I’ve learned how to avoid these pitfalls by following a well-structured system. Here are the 10 most common renovation mistakes and my strategies to prevent them:


1. Lack of Proper Planning

Mistake: Skipping detailed planning can lead to delays and budget overruns.
How I Avoid It: I always create detailed plans, including a budget and timeline, to ensure I know exactly what to expect.


2. Poor Surface Preparation

Mistake: Neglecting to prepare the floor or walls properly can result in uneven surfaces and poor finishes.
How I Avoid It: I thoroughly clean, repair, and level the surfaces to ensure a solid and aesthetic result.


3. Choosing the Wrong Materials

Mistake: Using materials that don’t suit the room’s requirements, such as non-waterproof materials in wet areas.
How I Avoid It: I choose materials based on the room’s function, like waterproof paint and tiles for bathrooms.


4. Using Low-Quality Tools

Mistake: Cheap tools can result in poor-quality work and uneven finishes.
How I Avoid It: I invest in high-quality tools that make the job easier and produce better results.


5. Working Too Fast

Mistake: Rushing leads to mistakes, uneven work, and missing details.
How I Avoid It: I take my time and work step by step, ensuring precision and quality.


6. Poor Lighting

Mistake: Working in poor lighting conditions can cause important details to be missed.
How I Avoid It: I ensure good lighting, whether it’s natural light or portable lamps.


7. Neglecting Electrical and Plumbing Systems

Mistake: Ignoring hidden systems can cause problems after the renovation is complete.
How I Avoid It: I review the electrical and plumbing systems before starting any renovation and call professionals if needed.


8. Improper Leveling

Mistake: Uneven floors or walls can cause tiles and furniture to fit poorly.
How I Avoid It: I always use a spirit level and self-leveling compound to ensure perfectly flat surfaces.


9. Ignoring Grouting and Joints

Mistake: Inaccurate grouting or joints can ruin the durability and aesthetics of the final result.
How I Avoid It: I use tile spacers and precision cutting tools to ensure perfect joints and finishes.


10. Neglecting Cleanup

Mistake: Dust and debris left behind after renovation can ruin the completed work.
How I Avoid It: I thoroughly clean the area after every task to ensure the final result is clean and professional.


Conclusion

The key to a successful indoor renovation lies in attention to detail and thorough planning. By avoiding these mistakes, you can achieve results that are not only beautiful but also durable. With a little patience and precision, the renovation process becomes simpler and more rewarding.

Which Type of Wall and Floor Covering Is Best for Your Home?

When planning your home’s wall or floor coverings, it’s essential to choose the right material. The type of covering you select will not only determine the aesthetic but also affect durability and practicality. Ceramic tiles, natural stone, laminate, or vinyl all have their own benefits, so it’s worth considering which is best suited for your space. Let’s explore how to choose the perfect covering!


1. Ceramic or Porcelain – Durable and Easy to Maintain

Ceramic and porcelain tiles are popular choices, especially for wet or high-traffic areas.

  • Characteristics: Highly durable, water-resistant, and resistant to stains and scratches.
  • Where to Use Them?
    • Bathroom: Ideal due to their water resistance and slip-resistant options.
    • Kitchen: Perfect for floors or backsplashes due to their easy-to-clean surface.
  • Advantages:
    • Extremely long-lasting.
    • Available in a wide variety of colors and patterns.
  • Disadvantages:
    • Cold and hard underfoot, which may feel less comfortable barefoot.

2. Natural Stone – Unique and Luxurious Appearance

Natural stone, such as marble, granite, or slate, adds timeless beauty to any space.

  • Characteristics: Each piece is unique, offering a luxurious and durable finish but requires regular maintenance.
  • Where to Use It?
    • Living or Dining Room: Provides an elegant, premium appearance.
    • Outdoor Patios or Terraces: Resistant to weather when properly treated.
  • Advantages:
    • Each piece is one-of-a-kind, adding character to the space.
    • Very durable if maintained regularly.
  • Disadvantages:
    • Expensive and requires professional installation.
    • Porous material that needs regular sealing.

3. Laminate Flooring – Affordable and Cozy Solution

Laminate flooring is an excellent choice if you want a natural look on a budget.

  • Characteristics: Easy to install, scratch-resistant, and available in many colors and patterns.
  • Where to Use It?
    • Bedroom: Provides a warm and cozy feel.
    • Living Room: Handles daily wear and tear effectively.
  • Advantages:
    • Quick to install and cost-effective.
    • Easy to clean and maintain.
  • Disadvantages:
    • Not water-resistant, so not ideal for bathrooms or kitchens.

4. Vinyl Flooring – Modern and Versatile Solution

Vinyl coverings are a modern alternative for spaces requiring water resistance and easy cleaning.

  • Characteristics: Flexible, waterproof, and low-maintenance.
  • Where to Use It?
    • Kitchen and Bathroom: Ideal due to its water resistance and easy care.
    • Children’s Rooms: Provides a soft and safe surface.
  • Advantages:
    • Highly durable and moisture-resistant.
    • Available in many styles and patterns, including wood and stone effects.
  • Disadvantages:
    • Less eco-friendly than other materials.
    • Can wear out over time if not installed properly.

Conclusion

Choosing the right wall or floor covering depends on the room’s function, style, and maintenance needs. While ceramic and porcelain tiles are practical and durable, natural stone adds a touch of luxury, laminate offers affordability and warmth, and vinyl provides a modern, versatile solution.

Color Psychology: How Colors Affect Your Mood

Colors don’t just define the style and ambiance of your home; they also have a profound impact on your emotions, energy levels, and overall well-being. The psychological effects of colors have fascinated people for centuries, and it’s now scientifically proven that different shades influence how we feel. If you’re planning the colors for your home, understanding how they affect us can help you make the right choices. Let’s explore the most common colors and their effects!


1. Blue – The Color of Calm and Focus

Blue represents calmness and harmony. Often associated with stability and trust, it’s an ideal choice for spaces where you want to relax or concentrate.

  • Where to Use It?
    • Bedroom: Helps you unwind and relax after a long day.
    • Home Office: Boosts focus and productivity.
  • Tip: If it feels too cool, pair it with warm tones like beige or gold.

2. Yellow – The Color of Optimism and Energy

Yellow is cheerful and vibrant, radiating positivity and energy. It’s a great choice if you want to make a space feel welcoming and lively.

  • Where to Use It?
    • Kitchen: Encourages communication and creates a positive atmosphere during family meals.
    • Living Room: Makes the space feel brighter and more spacious.
  • Tip: Use it sparingly, as too much yellow can be overwhelming.

3. Green – The Color of Nature and Balance

Green evokes the serenity of nature and promotes balance. Its soothing effect makes it perfect for creating a stress-free, refreshing environment.

  • Where to Use It?
    • Bathroom: Brings a sense of freshness and relaxation.
    • Living Room: Helps foster relaxation and harmony.
  • Tip: Light greens feel friendlier, while darker tones add a touch of elegance.

4. Red – The Color of Passion and Energy

Red is intense and powerful, stimulating the senses and boosting energy levels. While it’s exciting and attention-grabbing, use it carefully as too much red can feel overwhelming.

  • Where to Use It?
    • Dining Room: Enhances appetite and encourages social interaction.
    • Bedroom: Use in small amounts, such as accents, as it can be too stimulating.
  • Tip: Use it as an accent color to maintain a balanced atmosphere.

5. White – The Color of Cleanliness and Space

White conveys cleanliness and minimalism. It creates a bright and spacious feel, making it a popular choice for smaller rooms to make them appear larger.

  • Where to Use It?
    • Small Rooms: Makes spaces feel more open and light.
    • Kitchen: Creates a clean, modern look.
  • Tip: Pair it with other colors or textures to avoid a sterile look.

6. Gray – The Color of Neutrality and Elegance

Gray is one of the most versatile colors, offering a modern and sophisticated feel. It provides a neutral base that pairs well with almost any other color.

  • Where to Use It?
    • Living Room: Creates an elegant, timeless look.
    • Bedroom: Soothing, especially in lighter shades.
  • Tip: Choose warmer gray tones for a more inviting atmosphere.

Conclusion

The power of colors lies in their ability to influence our mood, energy levels, and the overall vibe of our homes. Whether you want to create a calming or energizing atmosphere, your choice of colors will play a significant role in shaping the space. Be sure to select shades that reflect your personal preferences and suit the function of each room.

How I Prepare for a Home Renovation and Why Proper Preparation Is Crucial

Home renovation is an exciting yet challenging process. Proper preparation is essential to ensure a smooth workflow and results that exceed expectations. Here’s how I prepare for a renovation project and what factors influence the duration of the work.


1. Preparing and Protecting the Workspace

The first step is always to prepare the workspace to keep everything clean and organized during the renovation:

  • Removing or protecting furniture: If possible, I completely clear the room of furniture. If that’s not feasible, I cover the furniture with protective sheets to shield it from dust and damage.
  • Covering the floors: I use protective sheets or cardboard panels to safeguard the floors from paint, adhesives, or other materials.

This ensures a clean workspace and minimizes the cleanup required after the project.


2. Inspection and Planning

A detailed assessment and precise planning are the keys to a successful renovation:

  • Inspecting for damage: I check the condition of walls, floors, and windows to determine if repairs are needed, such as sealing cracks, replacing tiles, or priming.
  • Material requirements: I create a comprehensive list of materials needed, including paints, tiles, adhesives, and tools.
  • Scheduling: Based on the initial plan, I establish the sequence of work, such as painting, tiling, and furnishing.

Thorough planning saves time and ensures a continuous workflow.


3. Repairs and Preparatory Work

Before starting the actual renovation, I complete all necessary preparatory tasks:

  • Repairing cracks and holes: I fix wall imperfections using filler or plaster.
  • Priming: I prime surfaces to enhance the adhesion of paint and adhesive materials.
  • Fixing structural elements: If the floors or windows are damaged, I repair or replace them as needed.

4. What Affects the Duration of Renovation?

The time required for renovation depends on several factors:

  • Size of the area: A smaller room requires less time, while a full apartment renovation can take significantly longer.
  • Type of work needed: Painting is usually faster than tasks like tiling or flooring installation.
  • Details and customization: Unique features or intricate work can extend the project’s duration.

On average, renovating a small room takes 3-5 days, while a full apartment renovation can take 2-3 weeks, depending on the complexity.


Why Is Proper Preparation Worth the Time?

Skipping preparation often leads to errors, such as structural issues or aesthetic flaws. A well-prepared project ensures faster and smoother progress and produces results that are both durable and visually appealing.


Conclusion

Preparation is the foundation of a successful home renovation. By dedicating time to planning, preparing the workspace, and addressing necessary repairs, you can speed up the process and ensure long-term satisfaction. I focus on these details in every project because I believe that a solid foundation is the key to outstanding results.

Washable Flooring: Is It Really Worth It?

When choosing indoor flooring for your home, it’s important to consider not only aesthetics but also durability and practicality. One popular option is washable flooring, which is easy to clean, resistant to wear, and maintains its beauty over time. But is it really worth choosing? Let’s explore when and why washable flooring might be the right choice for your home!


What Is Washable Flooring, and How Does It Differ from Traditional Options?

Washable flooring—such as tiles, laminate, or vinyl—features a special surface coating that makes it resistant to water, stains, and dirt. These materials are easy to clean, and frequent cleaning doesn’t damage their surface. Unlike traditional flooring, washable options are better equipped to handle moisture and the wear and tear of daily life.


When Should You Choose Washable Flooring?

1. Kitchens and Bathrooms

  • These spaces are constantly exposed to water, grease, and other stains.
  • Benefit: Washable flooring is waterproof, easy to clean, and doesn’t get damaged by frequent washing.

2. Entryways

  • Entryways often see mud, dirt, or rainwater tracked in.
  • Benefit: Washable flooring resists dirt and can be quickly wiped clean.

3. Kids’ Rooms

  • Spills, food stains, or drawing marks are common in kids’ rooms.
  • Benefit: Washable flooring makes it easier to maintain cleanliness as it can be easily wiped down.

Advantages of Washable Flooring

  1. Durability:
    Washable flooring is highly durable and retains its appearance for a long time.
  2. Easy Maintenance:
    It can be cleaned effortlessly with a damp cloth or mop, saving time and effort.
  3. Longevity:
    These floors have a longer lifespan as they resist wear and tear from daily use.
  4. Cost-Effectiveness:
    Although the initial cost may be higher, they require less maintenance and replacement, making them economical in the long run.

Are There Any Drawbacks?

  1. Higher Cost:
    Washable flooring is often more expensive than traditional options, which can mean a larger upfront investment.
  2. Surface Style:
    Some types have glossy or very smooth surfaces, which may not suit every style or preference.
  3. Cold Feeling:
    Certain washable flooring materials, like tiles, may feel colder underfoot compared to carpets or wooden floors.

Conclusion: Is Washable Flooring Worth It?

Washable flooring is ideal for spaces with high traffic or exposure to dirt and moisture, such as kitchens, bathrooms, or kids’ rooms. While the cost might be higher initially, the ease of cleaning and durability make it a cost-effective choice in the long run. If you’re looking for a flooring option that’s both practical and aesthetically pleasing, washable flooring is an excellent solution.

5 Tips for Choosing the Perfect Colors for Your Home

Selecting the right colors for your home is one of the most important decisions you can make to create a cozy and personal space. Colors not only influence your mood but also affect how you perceive a room’s size, style, and atmosphere. Here are 5 tips to help you find the perfect colors for your home.


1. Consider the Lighting

Natural and artificial lighting significantly impact how colors appear in a space:

  • Natural light: Brighter colors become more vibrant, while darker shades can appear subdued. For south-facing rooms, warmer shades work well, while cooler, lighter tones are better for north-facing spaces.
  • Artificial light: Different light sources create different effects. For example, warm lighting enhances yellow and orange hues, while cool lighting emphasizes blue and gray tones.

Tip: Always test colors at different times of the day to see how they change under varying light conditions.


2. Draw Inspiration from Your Décor

When choosing colors, take into account your furniture, textiles, and other decorative elements:

  • Harmonious color palette: If your furniture and accessories are already bold, opt for neutral wall colors to avoid overwhelming the space.
  • Style: Scandinavian-style homes pair well with natural, light hues, while bold and vibrant colors suit bohemian or eclectic designs.

Tip: Create a mood board to visualize how different colors and patterns work together.


3. Think About the Room’s Function

Every room serves a different purpose, and colors can enhance the atmosphere accordingly:

  • Bedroom: Soothing colors like light blue, pastel green, or beige promote relaxation and rest.
  • Living room: Warmer tones like yellow, terracotta, or cream create a welcoming and cozy ambiance.
  • Home office: Blues and grays boost focus, while a touch of green can spark inspiration.

Tip: Consider the main activities in each space and choose colors that align with its purpose.


4. Use the Color Wheel

To achieve a harmonious look, follow the rules of the color wheel:

  • Complementary colors: Colors opposite each other on the wheel (e.g., blue and orange) create a dynamic yet balanced effect.
  • Monochromatic palette: Different shades of the same color (e.g., light and dark blue) offer a sleek and cohesive look.
  • Analogous colors: Colors next to each other on the wheel (e.g., green and blue) evoke a natural, harmonious vibe.

Tip: Try online color planning tools to visualize how colors work together in your space.


5. Test the Colors

Before making a final decision, use sample paints to see how the colors look on your walls:

  • Paint samples: Apply a small patch of color to the wall and observe how it looks under different lighting conditions throughout the day.
  • Compare options: Test multiple colors side by side to see which one best complements your furniture and décor.

Tip: Never rely solely on a paint chip in the store, as colors will look different in your home environment.


Conclusion

Choosing the perfect colors takes time and attention, but by following these tips, you can create a color palette that truly makes your house feel like home. The harmony of colors not only enhances the aesthetic appeal of your space but also positively impacts your daily mood.