Color Psychology: How Interior Flooring and Wall Coverings Affect Your Mood

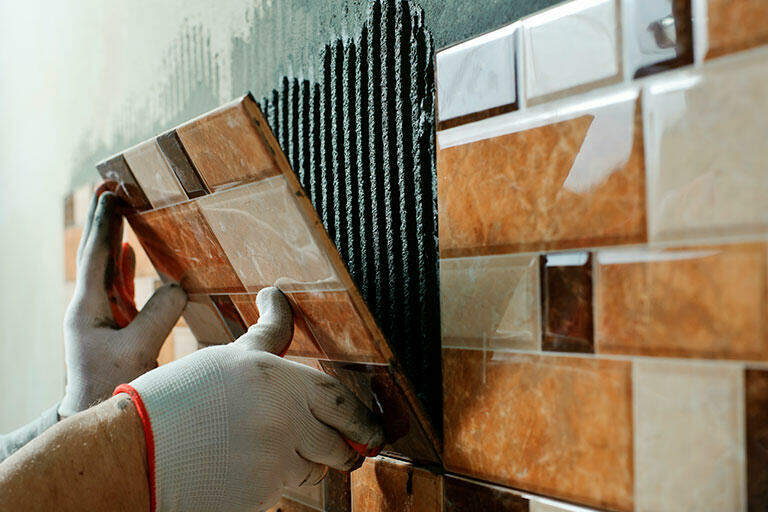
The colors of interior flooring and wall coverings don’t just shape the aesthetics of a space – they also have a significant impact on your mood. The right color choice can make a room feel calm, energetic, or welcoming. When selecting interior coverings, it’s important to consider the psychological effects of colors. Let’s explore how common colors influence your home’s atmosphere and how different types of flooring and wall coverings can help you achieve the desired effect.


1. Blue Coverings – The Color of Calm and Harmony

Blue is a symbol of tranquility and harmony, making it a perfect choice for creating a stress-free, relaxing environment.

  • In What Materials?
    • Blue tiles in bathrooms: Create a fresh, clean look with a calming effect.
    • Blue carpets or laminate flooring: Ideal for bedrooms or home offices.
  • Impact: Promotes relaxation, enhances focus, and fosters a serene atmosphere.

2. Yellow Coverings – The Color of Energy and Warmth

Yellow is energizing and cheerful, making it ideal for spaces where you want to radiate warmth and positivity.

  • In What Materials?
    • Yellow ceramic tiles in kitchens: Create a welcoming and inviting atmosphere.
    • Yellow-toned laminate flooring: Adds warmth to living rooms or dining areas.
  • Impact: Boosts energy and optimism while brightening the space.

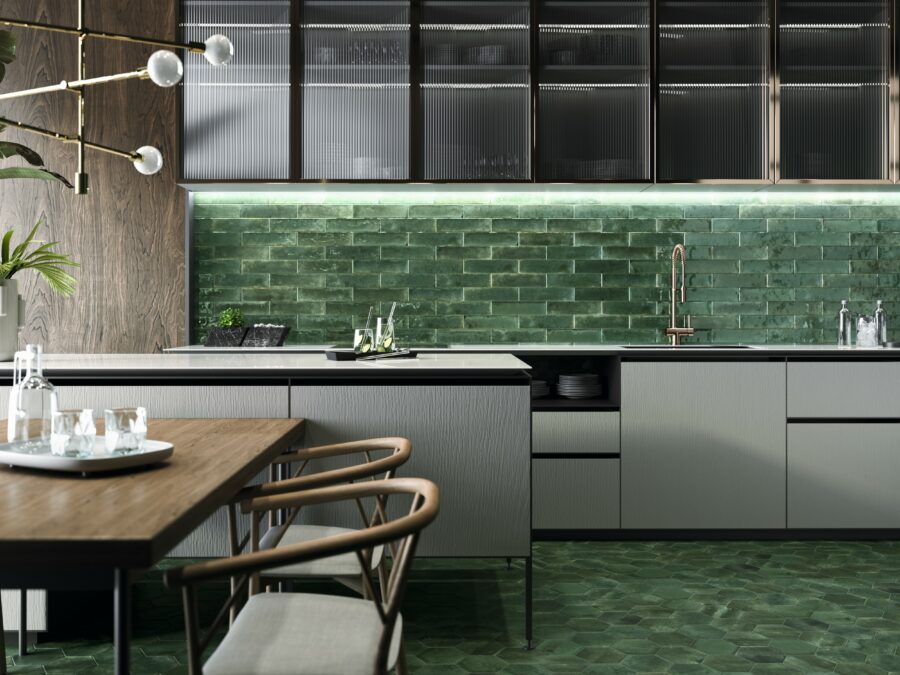
3. Green Coverings – The Color of Nature and Balance

Green evokes the closeness of nature and creates a soothing, harmonious feel. It’s a great choice for fresh and balanced interiors.

  • In What Materials?
    • Green tiles or mosaics: Perfect for bathrooms or kitchen backsplashes to bring in a natural, fresh vibe.
    • Green carpets: Great for relaxation areas, such as living rooms.
  • Impact: Reduces stress, promotes calmness, and fosters harmony in the space.

4. Red Coverings – The Color of Passion and Energy

Red is a bold and attention-grabbing color that stimulates the senses and brings vibrancy to any room.

  • In What Materials?
    • Red mosaics or decorative tiles: Use in dining rooms or feature walls to add energy and dynamism.
    • Red carpets: Perfect for creating a lively and bold look in certain spaces.
  • Impact: Energizes and excites, but too much red can feel overwhelming.

5. White Coverings – The Color of Cleanliness and Minimalism

White offers a clean and timeless look, making it ideal for smaller spaces to create a sense of openness and brightness.

  • In What Materials?
    • White ceramic tiles: Great for kitchens and bathrooms to emphasize cleanliness and freshness.
    • White laminate flooring: Perfect for minimalist or Scandinavian-style homes.
  • Impact: Enhances a sense of space, conveys purity, and pairs easily with other colors.

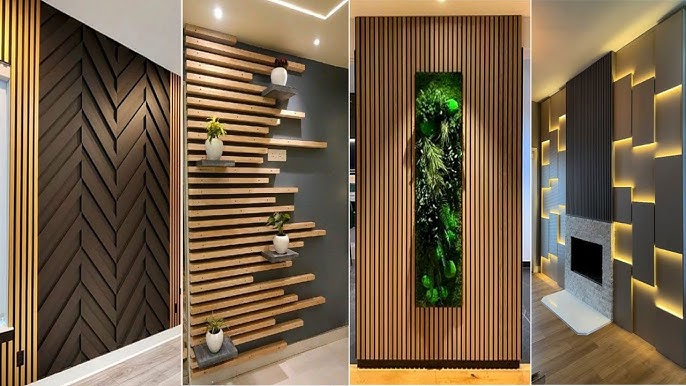
6. Gray Coverings – The Color of Elegance and Neutrality

Gray is modern and versatile, providing a neutral base that complements a variety of styles and color combinations.

  • In What Materials?
    • Gray tiles: Ideal for bathrooms or kitchen floors, creating a sleek and sophisticated look.
    • Gray laminate flooring: Perfect for living rooms or offices that need a subtle yet refined aesthetic.
  • Impact: Creates a calm, elegant atmosphere while working well with other colors and textures.

Conclusion

The colors of interior flooring and wall coverings greatly influence the mood and function of a space. Whether you want to evoke tranquility, energy, or harmony, choosing the right colors for your coverings can help you achieve your desired outcome. Select shades that best suit your home’s style and your personal preferences.

5 Tips for Choosing the Perfect Wall Cladding for Your Home

Wall cladding not only enhances the aesthetics of a space but also adds durability and functionality. Choosing the right cladding can be challenging, as there are many factors to consider. Here are 5 practical tips to help you select the best wall cladding for your home.


1. Consider the Room’s Function

Every room has different requirements when it comes to wall cladding:

  • Bathroom: Moisture-resistant tiles, like ceramic or porcelain, are ideal.
  • Kitchen: Easy-to-clean and heat-resistant materials, such as tiles or glass splashbacks, are practical choices.
  • Living Room: Decorative cladding, like natural stone or 3D panels, adds texture and style to the space.

Tip: Always think about the purpose the cladding needs to serve in a particular room.


2. Focus on Material Durability

The material of the cladding determines its longevity and ease of maintenance:

  • Ceramic and porcelain: Durable, water-resistant, and resistant to daily wear and tear.
  • Natural stone: Offers a unique and luxurious look but requires regular maintenance.
  • Wood or laminate panels: Create a warm and cozy feel but are less suitable for damp areas.

Tip: If you’re planning for the long term, choose a material that’s not only visually appealing but also practical for the space.


3. Think About Colors and Patterns

The color and pattern of the cladding greatly influence the room’s atmosphere:

  • Light colors: Make small spaces feel brighter and more spacious.
  • Dark colors: Add elegance but can make a space feel smaller.
  • Decorative patterns: Use patterns to highlight specific walls or features.

Tip: Aim for harmony between the cladding, furniture, and accessories to create a cohesive look.


4. Don’t Forget Maintenance

The ease of cleaning and maintenance is crucial for practical wall cladding:

  • Easy-to-clean surfaces: Tiles and glass splashbacks are low-maintenance and easy to keep spotless.
  • High-maintenance materials: Natural stone or wood requires regular sealing and cleaning.

Tip: If you want to save time, opt for low-maintenance materials that still offer a stylish appearance.


5. Test the Cladding

Before making a final decision, always test the cladding in the intended space:

  • Sample pieces: Request samples and place them against the wall to see how they look under the room’s lighting.
  • Matching: Compare the sample with your furniture and wall colors to ensure it complements the overall design.

Tip: Consider both aesthetics and practicality when evaluating your options.


Conclusion

Choosing the perfect wall cladding requires careful planning and attention to detail. By considering the room’s function, material durability, color harmony, and maintenance requirements, you can find cladding that fits your home perfectly. A well-chosen cladding is not only beautiful but also practical and long-lasting.

Which Season is Best for Indoor Tiling?

The timing of indoor tiling plays a crucial role in the quality of the work and the durability of the final result. Weather conditions, temperature, and humidity can impact not only outdoor but also indoor projects, especially when working with adhesives, grout, or other materials. Let’s explore which season is ideal for indoor tiling and what factors to consider!


Spring – The Season of Renewal

Spring is one of the best seasons for tiling, as the temperatures are mild and workspaces naturally ventilate well.

  • Advantages:
    • Moderate temperatures (10–25°C) are ideal for adhesive and grout drying.
    • Plenty of natural light makes precise work easier.
  • Caution: High humidity levels in early spring can slow down the setting process for tiling materials.

Summer – The Season of Quick Drying

In summer, the warm weather ensures faster drying for adhesives and grout, but extreme heat can pose challenges.

  • Advantages:
    • Faster drying times mean the work can be completed more quickly.
    • Long daylight hours allow for extended work periods.
  • Caution:
    • If indoor temperatures rise too high (above 30°C), adhesives may set too quickly, reducing adhesion strength.
    • Ensure proper ventilation to avoid excessive heat buildup.

Autumn – A Balanced Season

Like spring, autumn is a favorable time for indoor tiling, particularly during the mild early months.

  • Advantages:
    • Comfortable temperatures (10–20°C) ensure even curing of materials.
    • Lower humidity levels are less likely to interfere with the drying process.
  • Caution: As autumn progresses, cooler nights may slow down drying, especially in unheated spaces.

Winter – Suitable Only for Heated Spaces

Winter is the least ideal season for tiling unless the space is properly heated and ventilated. Cold and high humidity can cause issues with material curing and bonding.

  • Advantages:
    • The off-season for construction means fewer scheduling conflicts.
    • Indoor projects in heated and ventilated spaces are still possible.
  • Caution:
    • Cold temperatures (below 10°C) can significantly slow adhesive and grout drying.
    • Poor ventilation can make the workspace damp, hindering the quality of the tiling.

Weather Factors That Affect Indoor Tiling

  1. Temperature: Optimal working temperatures range between 10–25°C. Too cold and materials cure slowly; too hot and they cure too quickly, leading to cracks.
  2. Humidity: High humidity delays adhesive and grout setting times. Using a dehumidifier may help in such conditions.
  3. Ventilation: Proper ventilation speeds up the drying process and reduces humidity.
  4. Lighting: Adequate lighting helps ensure precise cuts, alignments, and grouting.

Conclusion

Spring and autumn are the best seasons for indoor tiling, as temperature and humidity levels are ideal. Summer can be beneficial for faster drying but requires caution with excessive heat. Winter is only suitable for heated and ventilated spaces. With the right timing and conditions, you can achieve results that are both beautiful and durable.

10 Inspiring Tile Combinations to Try

The colors and patterns of tiles play a crucial role in defining the atmosphere of your home. Well-chosen tile combinations are not only aesthetically pleasing but also practical, helping to create a cohesive and harmonious space. If you’re considering new tiles for your home, take inspiration from these 10 unique combinations that can transform any interior!


1. Pastel Pink Tiles and Mint Green Grout

This elegant pairing is a great choice for adding freshness and a unique touch to your space. The softness of pastel pink combined with the contrast of mint green creates a youthful yet calming effect.

  • Where to Use: Bathrooms or children’s rooms.

2. Navy Blue Wall Tiles and Beige Floor Tiles

This classic coastal-inspired color combination brings elegance and timelessness to your space. The deep navy blue wall tiles perfectly complement the light beige floor tiles.

  • Where to Use: Bathrooms or kitchens.

3. Yellow Mosaic and Gray Concrete Tiles

The vibrant yellow mosaic adds energy and joy, while the gray concrete tiles provide a clean and neutral base. This combination creates a modern and distinctive style.

  • Where to Use: Kitchen backsplashes or entryways.

4. White Subway Tiles and Dark Olive Floors

White subway tiles offer timeless elegance, while dark olive floor tiles add an earthy, grounded feel to the space.

  • Where to Use: Bathrooms or kitchens.

5. Peach Ceramic Tiles and Charcoal Gray Grout

This vibrant combination is a perfect choice for those who want a bold and stylish look. The warmth of peach tiles contrasts beautifully with the modern touch of charcoal gray grout.

  • Where to Use: Dining rooms or living rooms.

6. Camel Floor Tiles and Deep Blue Wall Tiles

The natural warmth of camel-colored floor tiles pairs beautifully with the sophisticated richness of deep blue wall tiles. This combination exudes elegance and timelessness.

  • Where to Use: Kitchens or living rooms.

7. Coral and Turquoise Mosaic

Coral tiles radiate warmth and cheerfulness, while turquoise mosaics bring a refreshing vibe. This playful pairing is a unique and creative solution.

  • Where to Use: Bathrooms or around pool areas.

8. Burgundy Marble Tiles and Champagne Grout

Burgundy marble tiles offer elegance and drama, while champagne-colored grout creates a subtle contrast for a luxurious finish.

  • Where to Use: Living rooms or dining areas.

9. Light Blue Cement Tiles with Sunflower Yellow Patterns

Light blue cement tiles bring a calming coolness, while sunflower yellow patterns add life and vibrancy to the space. This combination creates a cheerful and welcoming atmosphere.

  • Where to Use: Children’s rooms or kitchens.

10. Charcoal Black Tiles with Gold Accents

This luxurious combination is truly eye-catching. Charcoal black adds depth, while gold accents bring a touch of elegance and sophistication.

  • Where to Use: Living rooms, offices, or even bathrooms.

Conclusion

The color combinations of tiles can set the tone and character of your home. Whether you’re looking for a modern, classic, or playful aesthetic, these inspiring pairings can help you create a unique style for your space. Which combination will you try next?

The 10 Most Common Tiling Mistakes and How I Avoid Them

Tiling indoors is a significant task that greatly impacts your home’s aesthetics and durability. However, even small mistakes can have a big effect on the final result. After years of experience, I’ve developed a system that helps me avoid these issues. Here are the 10 most common tiling mistakes and my solutions to ensure a perfect finish:


1. Skipping Proper Preparation

Mistake: Uneven or dirty subfloors lead to unstable and uneven tiling.
How I Avoid It: I always clean the subfloor thoroughly and use a self-leveling compound if needed to create a smooth and stable base.


2. Choosing the Wrong Material

Mistake: Using the wrong type of tile for the room, such as non-waterproof tiles in wet areas.
How I Avoid It: I select materials suited to the room’s function, like waterproof tiles for bathrooms and durable laminate for living rooms.


3. Poor Measuring and Cutting

Mistake: Tiles don’t fit properly, and grout lines end up uneven.
How I Avoid It: I take precise measurements and use high-quality cutting tools to ensure the tiles fit perfectly.


4. Using the Wrong Adhesive

Mistake: Poor-quality or incorrect adhesive reduces the durability of the tiles.
How I Avoid It: I choose the right adhesive for the tile and substrate, always following the manufacturer’s instructions.


5. Uneven Grouting

Mistake: Grout lines that are too thick, too thin, or uneven ruin the overall look.
How I Avoid It: I use tile spacers to ensure consistent gaps and pay close attention to detail while grouting.


6. Incorrect Leveling

Mistake: Tiles are not level, causing aesthetic and functional problems.
How I Avoid It: I use a spirit level to check and maintain proper alignment throughout the process.


7. Skipping Expansion Gaps

Mistake: Not leaving proper expansion gaps causes tiles to crack over time.
How I Avoid It: I always leave adequate expansion gaps, especially where the floor meets the walls.


8. Using the Wrong Grout

Mistake: Using unsuitable or poor-quality grout that cracks or discolors over time.
How I Avoid It: I only use high-quality grout that matches the type of tile, ensuring it’s durable and easy to clean.


9. Rushing the Job

Mistake: Hurrying leads to uneven tiles and sloppy grout lines.
How I Avoid It: I take my time, working step by step to ensure a high-quality finish.


10. Neglecting Proper Cleanup

Mistake: Adhesive or grout left on the tile surface causes stains and an unprofessional look.
How I Avoid It: I clean the tiles immediately after grouting and adhesive application to prevent stains.


Conclusion

Indoor tiling requires precision and attention to detail. By avoiding these common mistakes and focusing on proper techniques, you can achieve beautiful, durable results. With patience and the right approach, tiling can be a rewarding and successful project.

How I Prepare for Wall Tiling and Why Proper Preparation Is Essential

When it comes to wall tiling, preparation is just as important as the tiling itself. A well-prepared surface ensures that the tiles adhere properly and look aesthetically pleasing. Let me share how I prepare for a tiling project and what factors influence the time it takes to complete the job.


1. Preparing and Protecting the Workspace

The first step is always to prepare the workspace to ensure everything stays clean and organized during the tiling process:

  • Removing or protecting furniture: I try to empty the room completely. If that’s not possible, I cover the furniture with protective sheets to avoid damage or dirt.
  • Protecting the floor: To prevent adhesive or grout spills from damaging the floor, I use heavy-duty plastic sheets or protective boards.

This step ensures a clean working environment and reduces the time needed for cleanup afterward.


2. Cleaning and Preparing the Walls

Tiles adhere best to clean and properly prepared walls:

  • Dust removal: I thoroughly clean the surface to remove dust, grease, or any other residue.
  • Smoothing the surface: If the wall is uneven, I use filler or plaster to even it out. This is especially important for decorative tiles to ensure a perfect finish.
  • Priming: I apply a special bonding primer to improve the adhesive’s grip on the surface.

3. Selecting and Preparing the Tiles

Choosing the right tiles and materials also impacts the project’s duration:

  • Pre-cutting tiles: I cut tiles to size and organize them in advance to streamline the installation process.
  • Preparing the adhesive: I always use the appropriate adhesive for the surface type to ensure durability.

4. What Affects the Duration of Tiling?

Several factors determine how long a tiling project will take:

  • The condition of the surface: Uneven walls or surfaces requiring significant repairs can extend the preparation time.
  • Type and pattern of tiles: Decorative patterns or intricate details take more time to complete.
  • Size of the area: Larger surfaces naturally require more time, especially if there are many corners, protrusions, or hard-to-reach spots.

On average, tiling a standard-sized room – including preparation – takes 2-4 days, but this varies depending on the project’s complexity.


Why Is Proper Preparation Worth the Time?

Skipping preparation can lead to future problems, such as tiles detaching or cracking prematurely. A well-prepared wall ensures that the tiles are both durable and visually flawless. I always focus on the small details in every project to ensure my clients are fully satisfied.


Conclusion

Preparing for wall tiling not only makes the job faster but also guarantees a durable and impeccable result. By carefully completing each step, the tiling won’t just look great but will also be highly functional.

What to Look for When Hiring a Tiler?

Starting a tiling project is an exciting step towards transforming your home, but finding the right professional is crucial for ensuring a flawless and durable result. Here’s a guide to help you choose the perfect tiler for your needs.


1. Check References

The first step is to verify the tiler’s previous work. Ask for photos of completed projects or contact details of previous clients. Some helpful questions include:

  • Were they satisfied with the final results?
  • Was the work completed on time and within budget?
  • Did the tiler pay attention to details, such as alignment and grouting?

2. Request a Detailed Quote

A professional tiler should provide a clear and detailed quote. This should include:

  • The cost of materials (tiles, adhesive, grout).
  • Labor costs and estimated duration of the project.
  • Any additional charges (e.g., travel or delivery fees).

Tip: Be wary of quotes that seem too low, as they might compromise on material quality or attention to detail.


3. Assess Professional Experience

Experience matters when it comes to tiling. Make sure the tiler has expertise in:

  • Different types of tiles (ceramic, porcelain, stone).
  • Wall and floor tiling, as well as decorative patterns.
  • Proper surface preparation and waterproofing for areas like bathrooms and kitchens.

An experienced tiler will know how to handle challenges such as uneven surfaces or complex layouts.


4. Communication and Attitude

A good tiler is approachable, listens to your needs, and offers useful advice. Pay attention to their communication style during the initial discussions. Key things to consider:

  • Do they help you choose the right tiles for your space?
  • Are they clear about timelines and project expectations?
  • Do they respond promptly and professionally?

5. Availability and Scheduling

Ensure the tiler is available when you need them and provides a realistic timeline for completing the project. A professional should also be transparent about any potential delays.


6. Guarantee on Work

A reputable tiler often provides a guarantee on their work. This ensures the quality of the installation and protects you against any issues, such as tiles lifting or grout cracking. Don’t hesitate to ask about their guarantee terms.


7. Cleanliness and Post-Work Cleanup

Tiling can create a mess, from adhesive spills to leftover grout. A professional tiler will clean up after the project and leave your space ready to use. Confirm if cleanup is included in their service.


Why Is a Careful Selection Important?

Choosing the right tiler ensures not only a visually appealing result but also a durable and functional installation. A reliable professional will provide peace of mind, clear communication, and attention to detail throughout the project.


Conclusion By following these steps, you’ll have a much better chance of finding a skilled tiler who delivers high-quality, precise work. Investing in a trustworthy tiler will save you time, money, and stress while ensuring your project is a success.

Which Type of Wall and Floor Covering Is Best for Your Home?

When planning your home’s wall or floor coverings, it’s essential to choose the right material. The type of covering you select will not only determine the aesthetic but also affect durability and practicality. Ceramic tiles, natural stone, laminate, or vinyl all have their own benefits, so it’s worth considering which is best suited for your space. Let’s explore how to choose the perfect covering!


1. Ceramic or Porcelain – Durable and Easy to Maintain

Ceramic and porcelain tiles are popular choices, especially for wet or high-traffic areas.

  • Characteristics: Highly durable, water-resistant, and resistant to stains and scratches.
  • Where to Use Them?
    • Bathroom: Ideal due to their water resistance and slip-resistant options.
    • Kitchen: Perfect for floors or backsplashes due to their easy-to-clean surface.
  • Advantages:
    • Extremely long-lasting.
    • Available in a wide variety of colors and patterns.
  • Disadvantages:
    • Cold and hard underfoot, which may feel less comfortable barefoot.

2. Natural Stone – Unique and Luxurious Appearance

Natural stone, such as marble, granite, or slate, adds timeless beauty to any space.

  • Characteristics: Each piece is unique, offering a luxurious and durable finish but requires regular maintenance.
  • Where to Use It?
    • Living or Dining Room: Provides an elegant, premium appearance.
    • Outdoor Patios or Terraces: Resistant to weather when properly treated.
  • Advantages:
    • Each piece is one-of-a-kind, adding character to the space.
    • Very durable if maintained regularly.
  • Disadvantages:
    • Expensive and requires professional installation.
    • Porous material that needs regular sealing.

3. Laminate Flooring – Affordable and Cozy Solution

Laminate flooring is an excellent choice if you want a natural look on a budget.

  • Characteristics: Easy to install, scratch-resistant, and available in many colors and patterns.
  • Where to Use It?
    • Bedroom: Provides a warm and cozy feel.
    • Living Room: Handles daily wear and tear effectively.
  • Advantages:
    • Quick to install and cost-effective.
    • Easy to clean and maintain.
  • Disadvantages:
    • Not water-resistant, so not ideal for bathrooms or kitchens.

4. Vinyl Flooring – Modern and Versatile Solution

Vinyl coverings are a modern alternative for spaces requiring water resistance and easy cleaning.

  • Characteristics: Flexible, waterproof, and low-maintenance.
  • Where to Use It?
    • Kitchen and Bathroom: Ideal due to its water resistance and easy care.
    • Children’s Rooms: Provides a soft and safe surface.
  • Advantages:
    • Highly durable and moisture-resistant.
    • Available in many styles and patterns, including wood and stone effects.
  • Disadvantages:
    • Less eco-friendly than other materials.
    • Can wear out over time if not installed properly.

Conclusion

Choosing the right wall or floor covering depends on the room’s function, style, and maintenance needs. While ceramic and porcelain tiles are practical and durable, natural stone adds a touch of luxury, laminate offers affordability and warmth, and vinyl provides a modern, versatile solution.

Washable Flooring: Is It Really Worth It?

When choosing indoor flooring for your home, it’s important to consider not only aesthetics but also durability and practicality. One popular option is washable flooring, which is easy to clean, resistant to wear, and maintains its beauty over time. But is it really worth choosing? Let’s explore when and why washable flooring might be the right choice for your home!


What Is Washable Flooring, and How Does It Differ from Traditional Options?

Washable flooring—such as tiles, laminate, or vinyl—features a special surface coating that makes it resistant to water, stains, and dirt. These materials are easy to clean, and frequent cleaning doesn’t damage their surface. Unlike traditional flooring, washable options are better equipped to handle moisture and the wear and tear of daily life.


When Should You Choose Washable Flooring?

1. Kitchens and Bathrooms

  • These spaces are constantly exposed to water, grease, and other stains.
  • Benefit: Washable flooring is waterproof, easy to clean, and doesn’t get damaged by frequent washing.

2. Entryways

  • Entryways often see mud, dirt, or rainwater tracked in.
  • Benefit: Washable flooring resists dirt and can be quickly wiped clean.

3. Kids’ Rooms

  • Spills, food stains, or drawing marks are common in kids’ rooms.
  • Benefit: Washable flooring makes it easier to maintain cleanliness as it can be easily wiped down.

Advantages of Washable Flooring

  1. Durability:
    Washable flooring is highly durable and retains its appearance for a long time.
  2. Easy Maintenance:
    It can be cleaned effortlessly with a damp cloth or mop, saving time and effort.
  3. Longevity:
    These floors have a longer lifespan as they resist wear and tear from daily use.
  4. Cost-Effectiveness:
    Although the initial cost may be higher, they require less maintenance and replacement, making them economical in the long run.

Are There Any Drawbacks?

  1. Higher Cost:
    Washable flooring is often more expensive than traditional options, which can mean a larger upfront investment.
  2. Surface Style:
    Some types have glossy or very smooth surfaces, which may not suit every style or preference.
  3. Cold Feeling:
    Certain washable flooring materials, like tiles, may feel colder underfoot compared to carpets or wooden floors.

Conclusion: Is Washable Flooring Worth It?

Washable flooring is ideal for spaces with high traffic or exposure to dirt and moisture, such as kitchens, bathrooms, or kids’ rooms. While the cost might be higher initially, the ease of cleaning and durability make it a cost-effective choice in the long run. If you’re looking for a flooring option that’s both practical and aesthetically pleasing, washable flooring is an excellent solution.