10 Inspiring Material Combinations for Interior Renovations

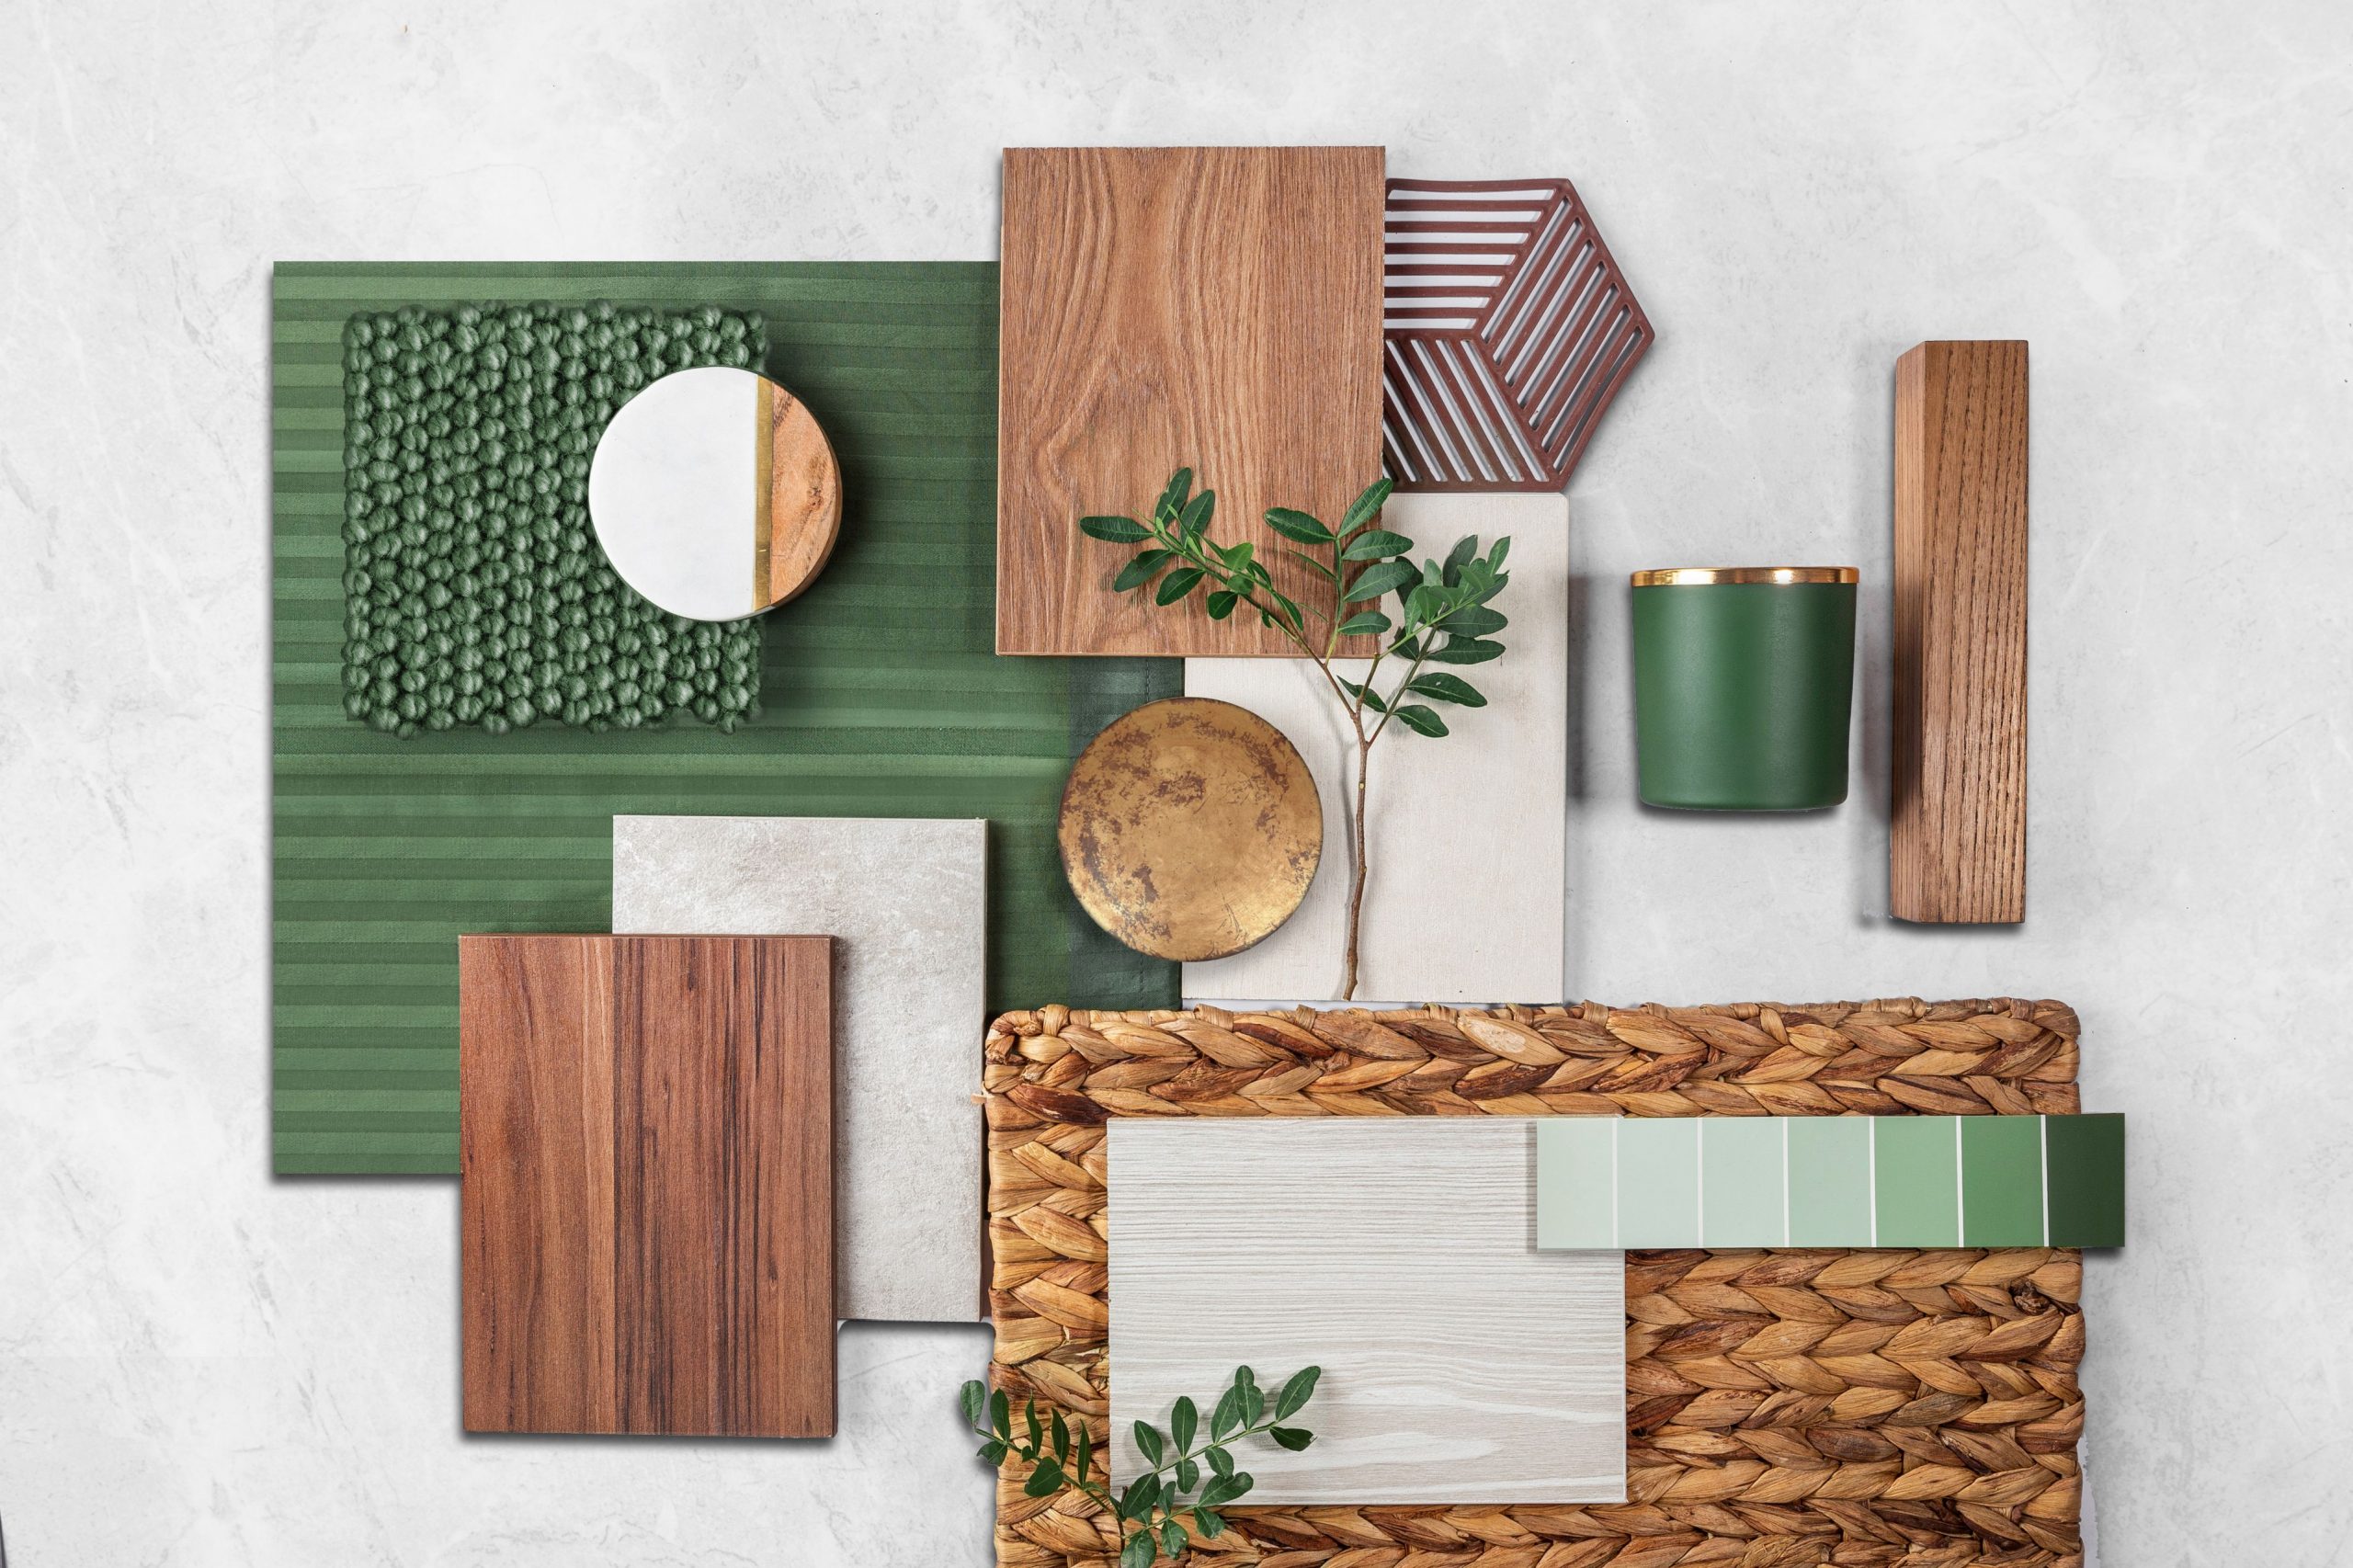
When it comes to interior renovations, the combination of materials and colors defines the style and atmosphere of your home. Choosing the right materials is not only about aesthetics but also practicality, as they determine the functionality of the space in the long run. Let’s explore 10 inspiring material combinations that can elevate your next renovation project!


1. White Paint and Wooden Panels

White paint brings a sense of cleanliness and openness, while natural wooden panels add warmth and texture. This combination creates a modern yet cozy atmosphere.

  • Where to Use: Living rooms, bedrooms, or hallways.

2. Concrete-Effect Wall Panels and Black Steel Accents

Concrete-effect wall panels provide a sleek, industrial look, which is further enhanced by black steel elements such as shelves or light fixtures.

  • Where to Use: Home offices or loft-style spaces.

3. Matte White Tiles and Colored Grout

Classic matte white tiles offer timeless elegance, while colored grout—such as mint green or yellow—adds a playful contrast.

  • Where to Use: Bathrooms or kitchens.

4. Laminated Wood Flooring and Pastel-Colored Walls

Laminated wood flooring brings a touch of nature, while pastel-colored walls, like light blue or pink, add subtle elegance and softness.

  • Where to Use: Bedrooms or living rooms.

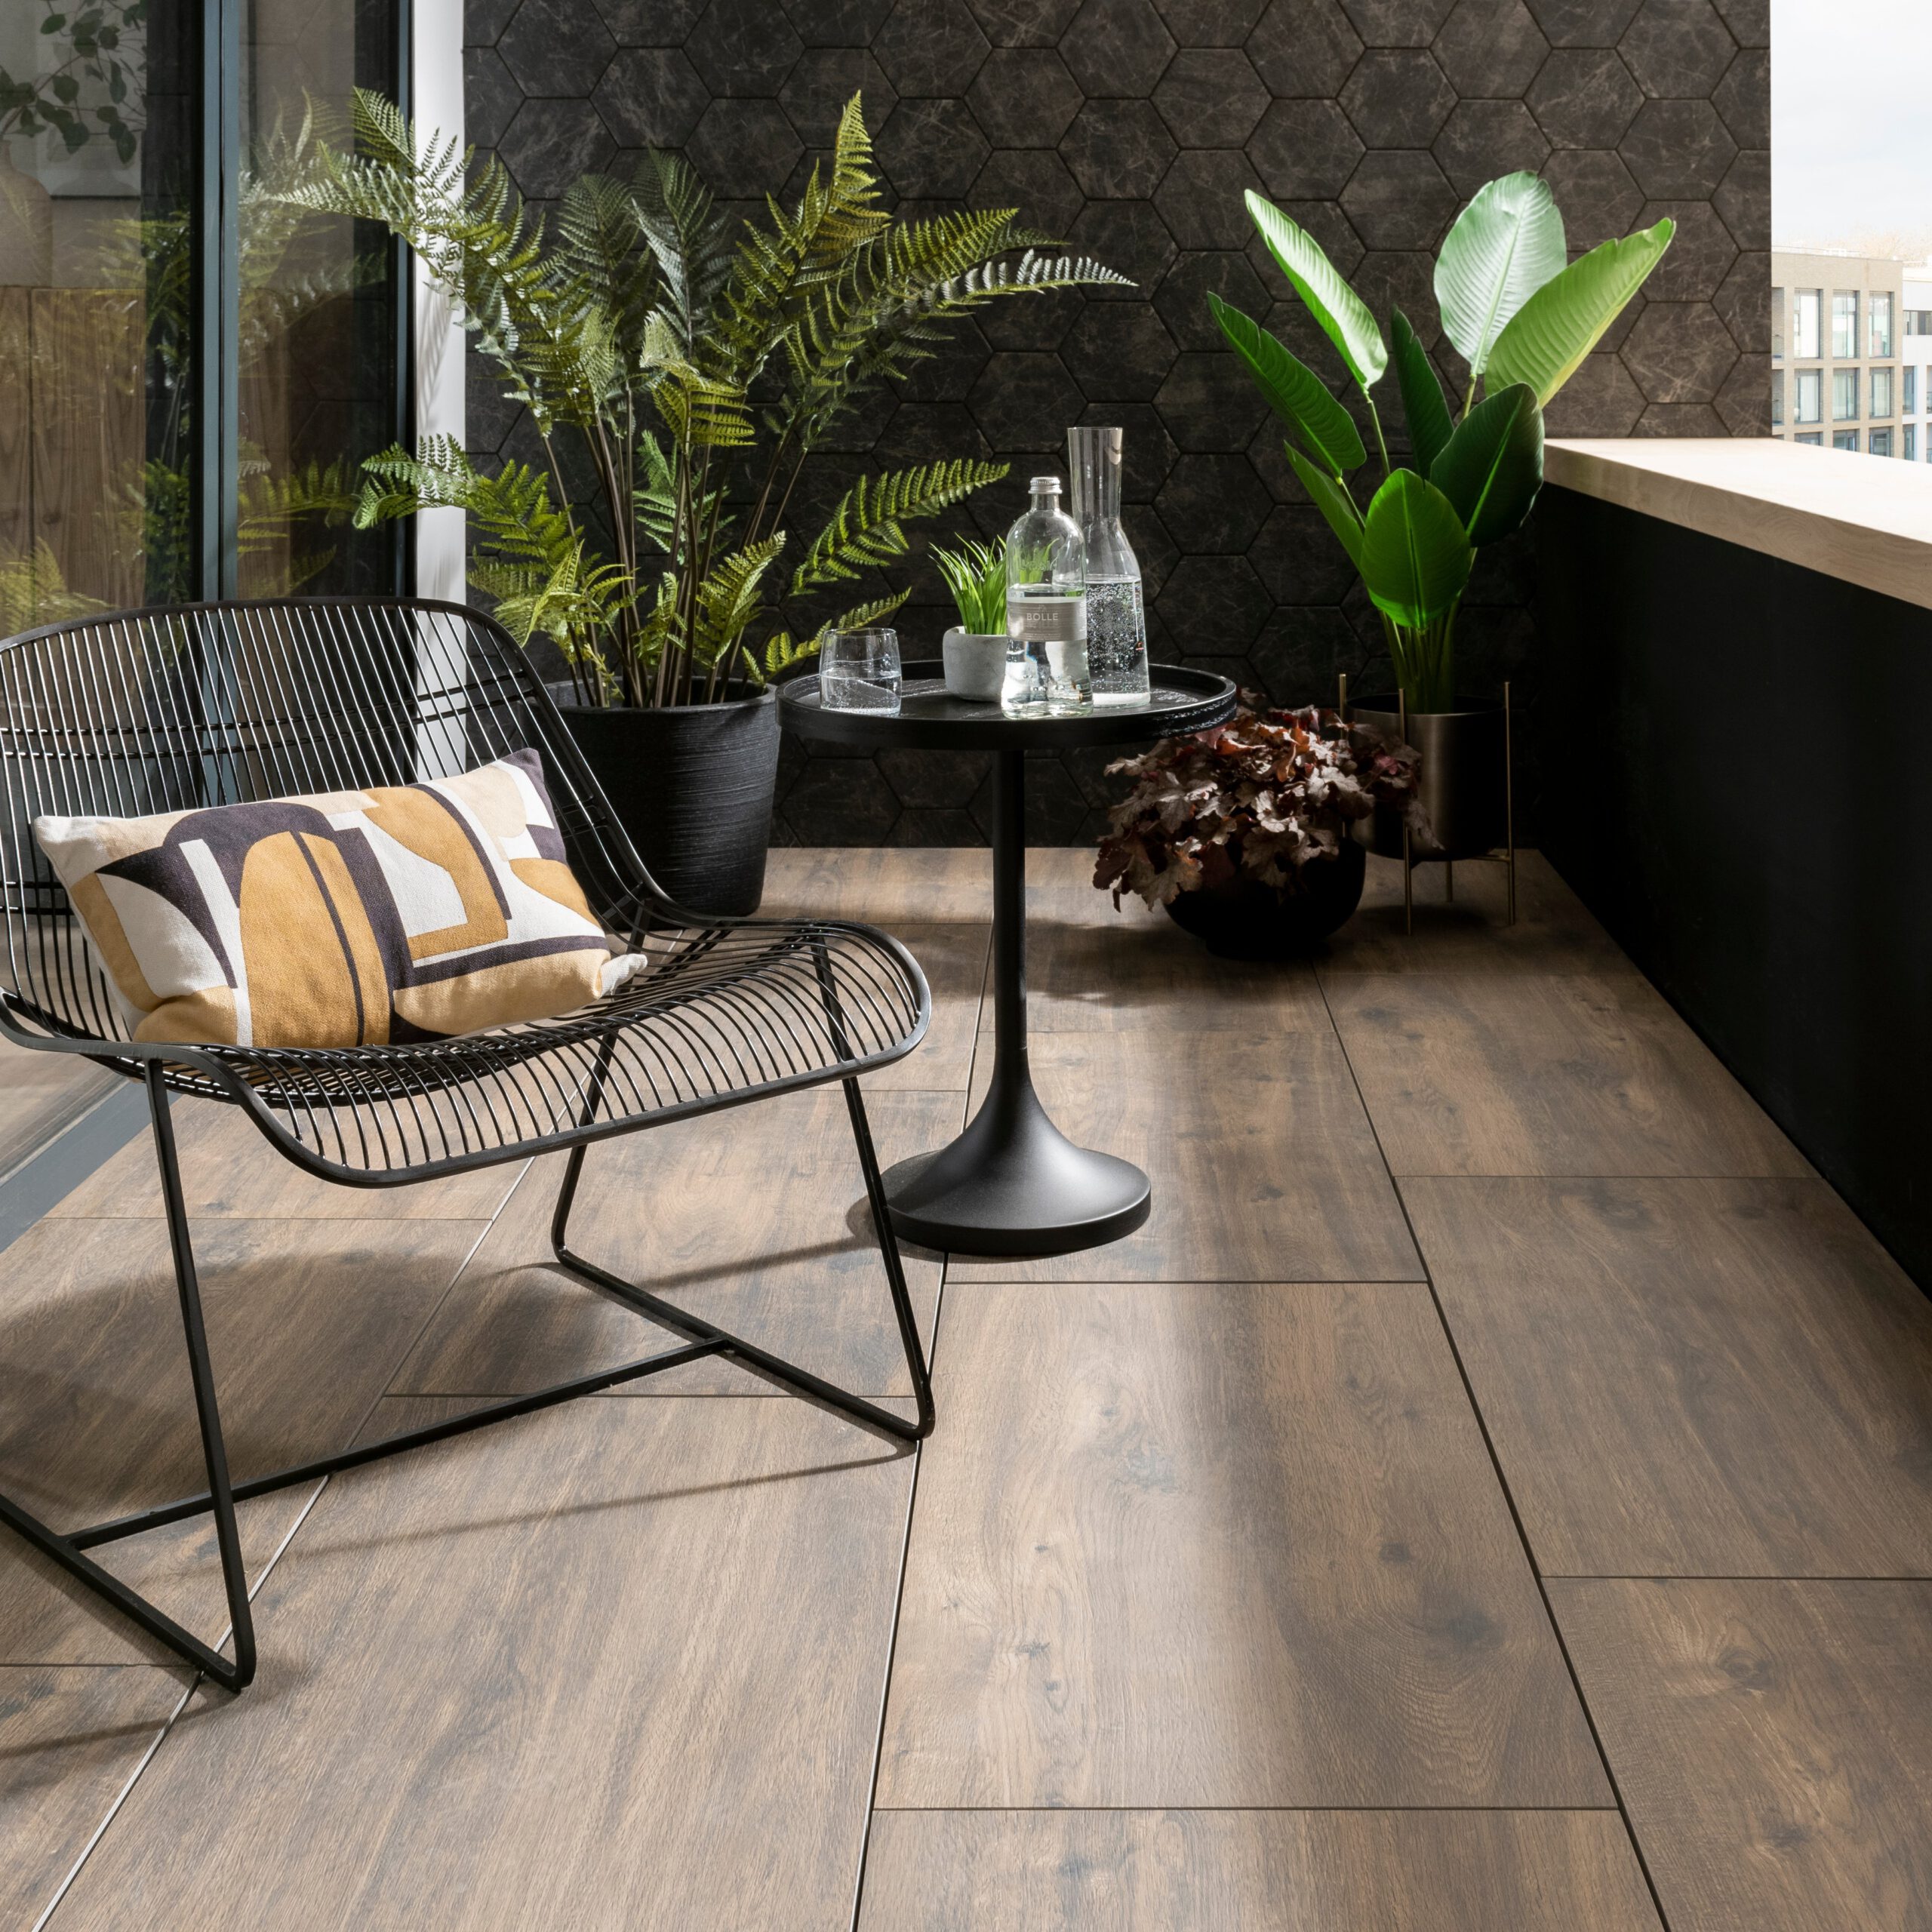
5. Glass Walls and Natural Stone Cladding

Glass walls create a modern, open feel, while natural stone cladding adds an earthy, organic texture. This combination strikes a balance between sophistication and nature.

  • Where to Use: Bathrooms or conservatories.

6. Glossy Black Cabinets and Marble Countertops

Glossy black cabinets create a dramatic, modern effect, while marble countertops add a luxurious touch. Together, they provide a premium aesthetic.

  • Where to Use: Kitchens or bathrooms.

7. Light Wood Flooring and Dark Blue Walls

Light wood flooring exudes freshness and a natural vibe, while dark blue walls add depth and drama. This combination works particularly well in larger spaces.

  • Where to Use: Living rooms or dining areas.

8. Cream Wallpaper and Gold Accents

Cream-colored wallpaper offers a soft, neutral base, while gold accents, such as lamps or frames, add a touch of elegance and sophistication.

  • Where to Use: Bedrooms or living rooms.

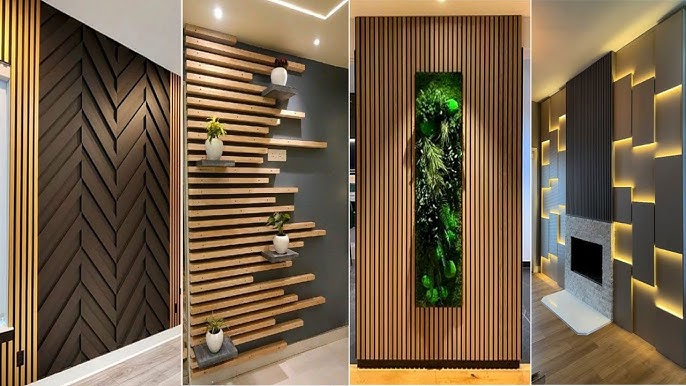
9. Dark Stone Cladding and Wooden Ceilings

Dark stone cladding creates a clean and modern base, while wooden ceilings bring warmth and a natural feel. This unique combination creates a distinctive and stylish space.

  • Where to Use: Bathrooms or living rooms.

10. Charcoal Black Walls and Light Concrete Flooring

Charcoal black walls deliver drama and modern elegance, while light concrete flooring adds an industrial and airy feel. This pairing is bold yet balanced.

  • Where to Use: Home offices or living rooms.

Conclusion

Choosing the right combination of materials for interior renovations greatly enhances the style and functionality of your home. Whether you’re aiming for a modern, classic, or nature-inspired look, these ideas can help you create a unique and harmonious space. Which material pairing would you choose for your next renovation project?

Color Psychology: How Interior Flooring and Wall Coverings Affect Your Mood

The colors of interior flooring and wall coverings don’t just shape the aesthetics of a space – they also have a significant impact on your mood. The right color choice can make a room feel calm, energetic, or welcoming. When selecting interior coverings, it’s important to consider the psychological effects of colors. Let’s explore how common colors influence your home’s atmosphere and how different types of flooring and wall coverings can help you achieve the desired effect.


1. Blue Coverings – The Color of Calm and Harmony

Blue is a symbol of tranquility and harmony, making it a perfect choice for creating a stress-free, relaxing environment.

  • In What Materials?
    • Blue tiles in bathrooms: Create a fresh, clean look with a calming effect.
    • Blue carpets or laminate flooring: Ideal for bedrooms or home offices.
  • Impact: Promotes relaxation, enhances focus, and fosters a serene atmosphere.

2. Yellow Coverings – The Color of Energy and Warmth

Yellow is energizing and cheerful, making it ideal for spaces where you want to radiate warmth and positivity.

  • In What Materials?
    • Yellow ceramic tiles in kitchens: Create a welcoming and inviting atmosphere.
    • Yellow-toned laminate flooring: Adds warmth to living rooms or dining areas.
  • Impact: Boosts energy and optimism while brightening the space.

3. Green Coverings – The Color of Nature and Balance

Green evokes the closeness of nature and creates a soothing, harmonious feel. It’s a great choice for fresh and balanced interiors.

  • In What Materials?
    • Green tiles or mosaics: Perfect for bathrooms or kitchen backsplashes to bring in a natural, fresh vibe.
    • Green carpets: Great for relaxation areas, such as living rooms.
  • Impact: Reduces stress, promotes calmness, and fosters harmony in the space.

4. Red Coverings – The Color of Passion and Energy

Red is a bold and attention-grabbing color that stimulates the senses and brings vibrancy to any room.

  • In What Materials?
    • Red mosaics or decorative tiles: Use in dining rooms or feature walls to add energy and dynamism.
    • Red carpets: Perfect for creating a lively and bold look in certain spaces.
  • Impact: Energizes and excites, but too much red can feel overwhelming.

5. White Coverings – The Color of Cleanliness and Minimalism

White offers a clean and timeless look, making it ideal for smaller spaces to create a sense of openness and brightness.

  • In What Materials?
    • White ceramic tiles: Great for kitchens and bathrooms to emphasize cleanliness and freshness.
    • White laminate flooring: Perfect for minimalist or Scandinavian-style homes.
  • Impact: Enhances a sense of space, conveys purity, and pairs easily with other colors.

6. Gray Coverings – The Color of Elegance and Neutrality

Gray is modern and versatile, providing a neutral base that complements a variety of styles and color combinations.

  • In What Materials?
    • Gray tiles: Ideal for bathrooms or kitchen floors, creating a sleek and sophisticated look.
    • Gray laminate flooring: Perfect for living rooms or offices that need a subtle yet refined aesthetic.
  • Impact: Creates a calm, elegant atmosphere while working well with other colors and textures.

Conclusion

The colors of interior flooring and wall coverings greatly influence the mood and function of a space. Whether you want to evoke tranquility, energy, or harmony, choosing the right colors for your coverings can help you achieve your desired outcome. Select shades that best suit your home’s style and your personal preferences.

The 10 Most Common Painting Mistakes and How I Avoid Them

Painting walls at home may seem simple, but there are plenty of mistakes that can ruin the final result. I’ve learned from my own experiences and developed a system that helps me avoid these pitfalls. Here are the 10 most common painting mistakes and my tips for preventing them:


1. Skipping Proper Preparation

Mistake: Many people skip cleaning the walls or fixing imperfections, which leads to uneven surfaces and poor paint adhesion.
How I Avoid It: I always clean the walls thoroughly and fill any cracks or holes with putty. Once the putty dries, I sand the surface smooth for an even base.


2. Skipping Primer

Mistake: Not using a primer can result in uneven paint coverage and blotchy finishes.
How I Avoid It: I always use a primer, especially on new walls or ones with stains. Primer helps the paint adhere evenly and enhances the final color.


3. Choosing the Wrong Paint

Mistake: Selecting paint that doesn’t match the room’s needs, such as using non-washable paint in high-traffic areas.
How I Avoid It: I choose paint based on the room’s purpose: washable paint for kitchens or kids’ rooms and matte paint for bedrooms.


4. Using Low-Quality Tools

Mistake: Cheap brushes and rollers can leave streaks and uneven coverage.
How I Avoid It: I invest in high-quality brushes and rollers, which make the job easier and ensure a smoother finish.


5. Using Incorrect Techniques

Mistake: Applying paint too quickly or too slowly can cause streaks and drips.
How I Avoid It: I work steadily and use a „W” or „M” motion with the roller to distribute the paint evenly.


6. Ignoring Drying Times Between Coats

Mistake: Impatience leads many to paint a second coat before the first has dried, causing blotches.
How I Avoid It: I let each coat dry completely before applying the next one to ensure smooth, even coverage.


7. Over-Thinning or Over-Thickening Paint

Mistake: Using paint that’s too thin or too thick results in uneven coverage or dripping.
How I Avoid It: I follow the manufacturer’s instructions and measure carefully if I need to thin the paint.


8. Poor Lighting While Painting

Mistake: Painting in bad lighting can lead to missed spots or uneven finishes.
How I Avoid It: I ensure good lighting by painting during the day or using strong, portable lights.


9. Neglecting Edges and Corners

Mistake: Overlooking edges and corners can make the finished job look sloppy.
How I Avoid It: I always start with a brush to carefully paint edges and corners, then use a roller for the larger surfaces.


10. Failing to Clean Tools Properly

Mistake: Neglecting to clean brushes and rollers promptly can make them unusable later.
How I Avoid It: I clean all my tools immediately after finishing the job so they’re ready for future use.

Color Psychology: How Colors Influence Your Interior

When renovating your interior, choosing the right colors is one of the most important decisions. Colors not only define the aesthetic of your home but also have a profound impact on your mood. They can transform how you perceive space, energize you, or provide a sense of calm. Let’s explore how to use the psychological effects of colors to create a harmonious and beautiful home during your renovation!


1. Blue – Calm and Focus for Everyday Life

Blue symbolizes calmness, stability, and harmony, making it ideal for spaces where you want to relax or focus.

  • Renovation Ideas:
    • Blue walls or accents in the bedroom: Promote relaxation and better sleep.
    • Blue cabinets or tiles in the home office: Enhance concentration and productivity.
  • Impact: Creates a tranquil atmosphere, reduces stress, and improves focus.

2. Yellow – Radiating Energy and Warmth

Yellow is the color of sunlight and optimism, bringing energy and warmth to your home.

  • Renovation Ideas:
    • Light yellow walls or furniture in the kitchen: Create a welcoming and cheerful vibe.
    • Yellow-toned lighting in the living room: Adds warmth and a cozy feel to the space.
  • Impact: Boosts energy, spreads positivity, and brightens the room.

3. Green – The Embodiment of Nature and Balance

Green brings the serenity of nature into your home, fostering a sense of peace and balance.

  • Renovation Ideas:
    • Green-painted walls or wallpaper in the living room: Create a relaxing and harmonious environment.
    • Add green plants as part of the décor: Bring freshness into the space.
  • Impact: Reduces stress, promotes relaxation, and adds balance.

4. Red – The Color of Passion and Energy

Red is bold and energizing, stimulating emotions and bringing vibrancy to a space. Use it carefully for a striking and dynamic effect.

  • Renovation Ideas:
    • Red accent walls in the dining room: Encourage social interaction and boost appetite.
    • Red decorations or furniture: Use sparingly to add energy and excitement to the room.
  • Impact: Increases energy levels, but too much red can feel overwhelming.

5. White – Cleanliness and Minimalism for Every Room

White offers a clean, modern, and timeless aesthetic. It’s a great choice for making spaces feel larger and brighter.

  • Renovation Ideas:
    • White walls or flooring: Make smaller rooms appear more open and airy.
    • White cabinets and shelves: Create a minimalist and organized look.
  • Impact: Conveys purity, enhances brightness, and pairs well with other colors.

6. Gray – Elegance and Neutrality for Modern Homes

Gray is one of the most versatile colors, offering a sophisticated and modern foundation. It’s perfect for creating neutral and harmonious spaces.

  • Renovation Ideas:
    • Gray walls in the living room: Provide a sleek and refined feel.
    • Gray tiles or flooring: Pair effortlessly with other colors and materials.
  • Impact: Creates a calm, timeless atmosphere while complementing other design elements.

Conclusion

During your interior renovation, choosing the right colors is essential as they significantly influence your home’s mood and functionality. Whether you’re aiming for calmness, energy, or balance, carefully selected colors can help you create an environment that fits your lifestyle perfectly.

5 Tips for Choosing the Perfect Wall Cladding for Your Home

Wall cladding not only enhances the aesthetics of a space but also adds durability and functionality. Choosing the right cladding can be challenging, as there are many factors to consider. Here are 5 practical tips to help you select the best wall cladding for your home.


1. Consider the Room’s Function

Every room has different requirements when it comes to wall cladding:

  • Bathroom: Moisture-resistant tiles, like ceramic or porcelain, are ideal.
  • Kitchen: Easy-to-clean and heat-resistant materials, such as tiles or glass splashbacks, are practical choices.
  • Living Room: Decorative cladding, like natural stone or 3D panels, adds texture and style to the space.

Tip: Always think about the purpose the cladding needs to serve in a particular room.


2. Focus on Material Durability

The material of the cladding determines its longevity and ease of maintenance:

  • Ceramic and porcelain: Durable, water-resistant, and resistant to daily wear and tear.
  • Natural stone: Offers a unique and luxurious look but requires regular maintenance.
  • Wood or laminate panels: Create a warm and cozy feel but are less suitable for damp areas.

Tip: If you’re planning for the long term, choose a material that’s not only visually appealing but also practical for the space.


3. Think About Colors and Patterns

The color and pattern of the cladding greatly influence the room’s atmosphere:

  • Light colors: Make small spaces feel brighter and more spacious.
  • Dark colors: Add elegance but can make a space feel smaller.
  • Decorative patterns: Use patterns to highlight specific walls or features.

Tip: Aim for harmony between the cladding, furniture, and accessories to create a cohesive look.


4. Don’t Forget Maintenance

The ease of cleaning and maintenance is crucial for practical wall cladding:

  • Easy-to-clean surfaces: Tiles and glass splashbacks are low-maintenance and easy to keep spotless.
  • High-maintenance materials: Natural stone or wood requires regular sealing and cleaning.

Tip: If you want to save time, opt for low-maintenance materials that still offer a stylish appearance.


5. Test the Cladding

Before making a final decision, always test the cladding in the intended space:

  • Sample pieces: Request samples and place them against the wall to see how they look under the room’s lighting.
  • Matching: Compare the sample with your furniture and wall colors to ensure it complements the overall design.

Tip: Consider both aesthetics and practicality when evaluating your options.


Conclusion

Choosing the perfect wall cladding requires careful planning and attention to detail. By considering the room’s function, material durability, color harmony, and maintenance requirements, you can find cladding that fits your home perfectly. A well-chosen cladding is not only beautiful but also practical and long-lasting.

Washable Paints: Are They Really Worth It?

Choosing the right paint for your home renovation is crucial, as it impacts not only the aesthetics but also the durability and practicality of the results. In recent years, washable paints have gained popularity due to their promise of greater resistance compared to traditional paints. But are they really worth choosing? Let’s explore when and why washable paints might be the right choice for your home!


What Are Washable Paints, and How Do They Differ from Traditional Paints?

Washable paints are specially formulated with components that make them more resistant to stains, dirt, and moisture. These paints typically create a smooth, slightly glossy, or satin finish, which allows for easy cleaning without damaging the paint layer. Unlike traditional paints, washable paints are more durable when exposed to scrubbing and wet cleaning.


When Should You Choose Washable Paints?

1. High-Traffic Areas

  • Spaces like kitchens, hallways, or living rooms are often exposed to everyday wear and tear, including fingerprints, grease stains, and dirt marks.
  • Benefit: Washable paints make it easy to clean these areas without needing frequent repainting.

2. Kids’ Rooms

  • Kids’ creativity often finds its way onto the walls, whether through markers, crayons, or food stains.
  • Benefit: Washable paints resist most stains, making the walls easy to clean and maintain.

3. Bathrooms or Other Damp Areas

  • Washable paints are often water-resistant, making them ideal for bathrooms, laundry rooms, or other spaces exposed to moisture.
  • Benefit: They prevent mold growth and are easy to maintain in damp environments.

Advantages of Washable Paints

  1. Durability:
    Washable paints are far more resistant to wear and mechanical damage compared to traditional paints.
  2. Easy Maintenance:
    Stains can be removed effortlessly with a damp sponge or cloth without damaging the paint.
  3. Longevity:
    The walls stay clean and aesthetically pleasing for longer, reducing the need for frequent repainting.
  4. Cost-Effectiveness:
    While washable paints are generally more expensive, they save money in the long run by requiring fewer touch-ups and repaints.

Are There Any Drawbacks?

  1. Higher Cost:
    Washable paints are more expensive than regular interior paints, which might require a larger upfront investment.
  2. Smooth Finish:
    These paints usually result in a smooth or satin finish, which may not suit all styles or preferences.
  3. Environmental Concerns:
    Some washable paints contain more chemicals, making them less environmentally friendly than traditional options.

Conclusion: Are Washable Paints Worth It? Washable paints are ideal for rooms that experience high levels of use, such as kids’ rooms, kitchens, and bathrooms. While they come with a higher price tag, their durability and easy maintenance make them a cost-effective choice in the long run. If you’re looking for a paint option that is both practical and visually appealing, washable paints are an excellent solution.

What to Look for When Hiring a Renovation Specialist?

Starting a renovation project can bring exciting changes to your home, but finding the right specialist is crucial for ensuring a seamless process and high-quality results. Here’s a guide to help you find a reliable, experienced, and precise professional who can turn your vision into reality.


1. Check References

The first and most important step is to verify the quality of the specialist’s previous work. Request reference photos or contact details for past clients. Some helpful questions to ask include:

  • Were they satisfied with the final results?
  • Was the work completed on time and within budget?
  • Did the specialist pay attention to details, such as cleanliness and finishing touches?

2. Request a Detailed Quote

A professional renovation specialist should provide a transparent and detailed quote. This should include:

  • Material costs (paint, tiles, tools, etc.).
  • Labor costs and estimated duration of the project.
  • Any additional fees (e.g., travel or delivery charges).

Tip: Be cautious of suspiciously low quotes, as these often indicate compromises in material quality or attention to detail.


3. Assess Professional Experience

Make sure the specialist has experience in a variety of renovation tasks, such as:

  • Interior and exterior painting.
  • Tiling and flooring installation.
  • Small repairs, such as fixing wall damage or adjusting doors and windows.

Experience ensures that the work will be completed efficiently and without major issues.


4. Communication and Attitude

A good specialist listens to your needs, provides valuable advice, and communicates clearly. During initial discussions, pay attention to their communication style. Consider the following:

  • Do they help you choose suitable materials and colors?
  • Do they clearly outline the project timeline and expectations?
  • Are they professional and polite when answering your questions?

5. Scheduling and Flexibility

Ensure the specialist is available when you need them and provides realistic timelines for completing the work. A reliable professional can handle unexpected challenges, such as material shortages or minor technical issues, without significant delays.


6. Guarantee on Work

A trustworthy specialist often offers a guarantee for their work, ensuring the results are durable and defect-free. Don’t hesitate to ask about the length and terms of the guarantee.


7. Cleanliness and Site Maintenance

Renovations can create a lot of mess, but a professional specialist will keep the work area clean and organized. Confirm whether post-project cleanup is included in their services to avoid unnecessary hassle.


Why Is Careful Selection Important?

Choosing a skilled and reliable specialist impacts not only the final result but the entire renovation experience. A professional will deliver high-quality work while making the process stress-free with clear communication and meticulous attention to detail.


Conclusion

By following these steps, you’ll significantly increase your chances of finding a renovation specialist who is precise, trustworthy, and capable of delivering excellent results. Remember, a quality renovation is a long-term investment in your home’s value and comfort.

Which Season is Best for Indoor Tiling?

The timing of indoor tiling plays a crucial role in the quality of the work and the durability of the final result. Weather conditions, temperature, and humidity can impact not only outdoor but also indoor projects, especially when working with adhesives, grout, or other materials. Let’s explore which season is ideal for indoor tiling and what factors to consider!


Spring – The Season of Renewal

Spring is one of the best seasons for tiling, as the temperatures are mild and workspaces naturally ventilate well.

  • Advantages:
    • Moderate temperatures (10–25°C) are ideal for adhesive and grout drying.
    • Plenty of natural light makes precise work easier.
  • Caution: High humidity levels in early spring can slow down the setting process for tiling materials.

Summer – The Season of Quick Drying

In summer, the warm weather ensures faster drying for adhesives and grout, but extreme heat can pose challenges.

  • Advantages:
    • Faster drying times mean the work can be completed more quickly.
    • Long daylight hours allow for extended work periods.
  • Caution:
    • If indoor temperatures rise too high (above 30°C), adhesives may set too quickly, reducing adhesion strength.
    • Ensure proper ventilation to avoid excessive heat buildup.

Autumn – A Balanced Season

Like spring, autumn is a favorable time for indoor tiling, particularly during the mild early months.

  • Advantages:
    • Comfortable temperatures (10–20°C) ensure even curing of materials.
    • Lower humidity levels are less likely to interfere with the drying process.
  • Caution: As autumn progresses, cooler nights may slow down drying, especially in unheated spaces.

Winter – Suitable Only for Heated Spaces

Winter is the least ideal season for tiling unless the space is properly heated and ventilated. Cold and high humidity can cause issues with material curing and bonding.

  • Advantages:
    • The off-season for construction means fewer scheduling conflicts.
    • Indoor projects in heated and ventilated spaces are still possible.
  • Caution:
    • Cold temperatures (below 10°C) can significantly slow adhesive and grout drying.
    • Poor ventilation can make the workspace damp, hindering the quality of the tiling.

Weather Factors That Affect Indoor Tiling

  1. Temperature: Optimal working temperatures range between 10–25°C. Too cold and materials cure slowly; too hot and they cure too quickly, leading to cracks.
  2. Humidity: High humidity delays adhesive and grout setting times. Using a dehumidifier may help in such conditions.
  3. Ventilation: Proper ventilation speeds up the drying process and reduces humidity.
  4. Lighting: Adequate lighting helps ensure precise cuts, alignments, and grouting.

Conclusion

Spring and autumn are the best seasons for indoor tiling, as temperature and humidity levels are ideal. Summer can be beneficial for faster drying but requires caution with excessive heat. Winter is only suitable for heated and ventilated spaces. With the right timing and conditions, you can achieve results that are both beautiful and durable.

How I Prepare for Painting and Why Proper Preparation is Important

Many people think that painting is just about applying paint to walls, but in reality, preparation is just as important as the painting itself. Proper planning and preparation not only affect the quality of the final result but also influence how smoothly and quickly the project goes. Let me share how I prepare for a painting job and what to keep in mind during this process.


1. Protecting Furniture and Floors

The first step is ensuring the furniture and floors are protected from paint splatters. Here’s how I handle it:

  • Moving furniture: If possible, I remove all movable furniture from the room. For larger or heavier items, I place them in the center of the room and cover them.
  • Using protective sheets: I cover the floor and any remaining furniture with heavy-duty plastic sheets. I also use masking tape along the baseboards to ensure clean paint edges.

This step is crucial not only for a clean painting process but also for a quick and hassle-free cleanup afterward.


2. Cleaning the Walls

Paint adheres best to clean and smooth surfaces, so I always clean the walls thoroughly before starting to paint.

  • Removing dust and dirt: I wipe down the walls with a damp cloth or mild soapy water to remove dust, grease, or other stains.
  • Dealing with mold or stains: If I find mold, I treat it with special cleaners to ensure it doesn’t affect the durability of the paint.

Clean walls guarantee not only a beautiful finish but also prevent uneven adhesion of the paint.


3. Repairing Cracks and Flaws

The key to a flawless paint job is a smooth surface, so I always repair any wall imperfections:

  • Filling cracks and holes: I fill small cracks and holes with filler. Once it dries, I sand it down with fine sandpaper to create an even surface.
  • Priming: I often use primer during preparation to ensure better paint adhesion and prevent old colors from showing through the new coat.

These steps ensure the final result is both uniform and durable.


4. What Affects the Duration of Painting?

Several factors influence how long a painting project will take, and preparation is one of the most important. Here’s how I typically estimate:

  • Room size: Naturally, larger rooms require more time for preparation and painting.
  • Wall condition: If there are many cracks or stains, more time is needed for repairs.
  • Number of coats: I usually apply two coats of paint for a vibrant and long-lasting finish. This means allowing time for the layers to dry in between.
  • Details: Rooms with a lot of corners, trims, or edges require more precision and time.

On average, painting a standard-sized room – including preparation – takes about 2-3 days, but every project is unique.


Why Is Proper Preparation Worth It?

Many people want to rush through painting, but skipping preparation can lead to long-term issues. Paint adheres more evenly to well-prepared walls, lasts longer, and the entire process is smoother. By paying attention to these steps, the result will not only look great but also be of high quality.


Conclusion

Preparation for painting ensures a clean and organized workspace as well as a durable and beautiful result. By dedicating the right amount of time and effort to preparation, the painting process becomes faster and more efficient. I always focus on these details in every project because I know that a great foundation is essential for flawless painting.

Which Renovation Solution Is Best for Your Home?

When it comes to home renovation, there are countless decisions to make: which materials to choose, how to optimize the space, and which solutions best meet your needs. Below, I’ll highlight the key renovation options to help guide your choices.


1. Replacing Flooring – For a Durable and Stylish Solution

Changing your flooring is one of the most impactful parts of a renovation, as it greatly influences the space’s look and functionality.

  • Ceramic or Porcelain Tiles: Ideal for wet areas like bathrooms or kitchens due to their durability and water resistance.
  • Laminate Flooring: Provides a warm, cozy feel and is a budget-friendly option for living rooms or bedrooms.
  • Vinyl Flooring: A modern, easy-to-clean choice, perfect for families with children or pets.

Tip: Consider how much wear and tear your flooring will experience, and choose based on durability and style.


2. Wall Upgrades – Transforming the Atmosphere of Your Home

Upgrading walls through painting or cladding is one of the easiest ways to change your home’s atmosphere.

  • Painting: Matte paints provide a sophisticated, calming look, while satin or gloss paints are more durable and easier to clean.
  • Decorative Panels or Wallpaper: Add unique style, especially in living rooms or bedrooms.
  • Tiling: A practical and aesthetic choice for kitchen backsplashes or bathroom walls.

Tip: Choose materials that are not only visually appealing but also easy to maintain.


3. Lighting Upgrades – Combining Functionality and Mood

Lighting has a significant impact on your home’s functionality and ambiance, so it’s worth paying attention to this aspect:

  • Recessed Lighting: Offers a sleek, modern look, perfect for living rooms or kitchens.
  • Adjustable Light Fixtures: Great for multi-purpose spaces like bedrooms or home offices.
  • LED Lighting: Energy-efficient and long-lasting, available in various color temperatures.

Tip: Think about the function of the space – for example, task lighting for kitchen counters versus ambient lighting for the living room.


4. Storage Solutions – Organization and Harmony

A renovation is the perfect opportunity to optimize your storage spaces:

  • Built-In Cabinets: Maximize space and create a seamless look.
  • Open Shelving: Practical and decorative, ideal for living rooms or kitchens.
  • Hidden Storage: Great for small apartments, like under-bed drawers or multifunctional furniture.

Tip: Organized storage improves not only functionality but also the overall aesthetic of your home.


5. Energy-Efficient Solutions – Eco-Friendly Renovation

Energy efficiency benefits both the environment and your wallet:

  • Insulation: Improves your home’s temperature regulation and reduces heating and cooling costs.
  • Energy-Efficient Windows and Doors: Help minimize heat loss while providing a modern appearance.
  • Smart Home Solutions: Such as thermostats that optimize energy consumption.

Tip: Energy-efficient upgrades are a long-term investment that can save you significant costs over time.


Conclusion

The success of your home renovation lies in the planning. Whether you’re replacing flooring, upgrading